How to Roast Coffee at Home: A Beginner's Guide (2024)
Learn how to roast coffee at home with this step-by-step guide. Discover easy methods, essential equipment, and tips for achieving the perfect roast in your kitchen.
There was one moment, maybe at a cafe or a friend’s dining table, where you sipped a coffee that blossomed the idea that coffee could taste different flavors and that it could be wonderful. Maybe that coffee was chocolatey or fruity; whatever it was, it opened your mind up to new possibilities. Now, imagine sipping a cup of coffee made from beans you roasted yourself and getting those kinds of flavors again, and its aroma fills your kitchen. Sounds amazing, right? When you roast at home, you guarantee that you have the freshest coffee possible and your best chance of getting amazing flavors, time after time.
When I first started roasting coffee at home, I was blown away by the difference in taste. Before it was like drinking coffee in black and white, and suddenly, everything was in color. Even when the roasts didn’t go as well as I liked, (which, still being a novice still sometimes happen as I continue to experiment), the simple difference in freshness and selecting the green coffee beans made the quality of the coffee so much better than I could buy from the grocery store. It becomes a fun weekend ritual that feels good when you drink it during the weekday mornings and when you give a bag to a friend.
In this guide, we'll cover everything you need to know (and I wish I had known) about home coffee roasting - from the equipment you'll need to step-by-step instructions. So grab a cup of joe (soon to be your own roast!), and let's dive in!
Why Learn How to Roast Coffee at Home?
Bad coffee sucks. And the day you discover great coffee, you dread the bad stuff. In Seoul, South Korea, I discovered good coffee thanks to Beans Seoul, an art gallery and the best coffee roaster I ever had. (The website is in Korean, but you can find them here near Sogang, university). I had wandered by and smelled the coffee roasting (which in 2010 wasn’t common) and then bought some coffee as a laugh, and it expanded my mind. While I waited, we chatted a bit, and he did a pour-over coffee for me. I simply couldn’t believe how much better it was than every other coffee I had ever had. Ever since, every coffee shop and everywhere has been measured against Seoul Beans and that magical moment, while snow fell on the sidewalk and roast filled the air.
Roasting coffee at home makes drinking coffee more than just something to do, it makes you aware of how stale most coffee people drink is. Freshness is king in the coffee world. Peak flavor hits within days after roasting. By learning how to roast coffee at home, you're guaranteeing the freshest cup possible. It's like the difference between a garden-fresh tomato and one that's been sitting in the supermarket for weeks.
Then there's the cost factor. While there's an initial investment in equipment, green coffee beans are generally cheaper than pre-roasted ones. (Even much higher quality ones). Over time, you'll be saving money while drinking better coffee.
But the real joy? It's all about customization. When you know how to roast coffee at home, you're in control. Like your coffee a bit lighter? Prefer a bold, dark roast? It's your coffee, roast it your way.
Essential Equipment for Home Coffee Roasting
Let's talk tools. The good news? You probably already have some of what you need to start learning how to roast coffee at home.
For beginners, there are three main methods:
1. Pan roasting: Yep, like frying eggs.
2. Oven roasting: Great for larger batches.
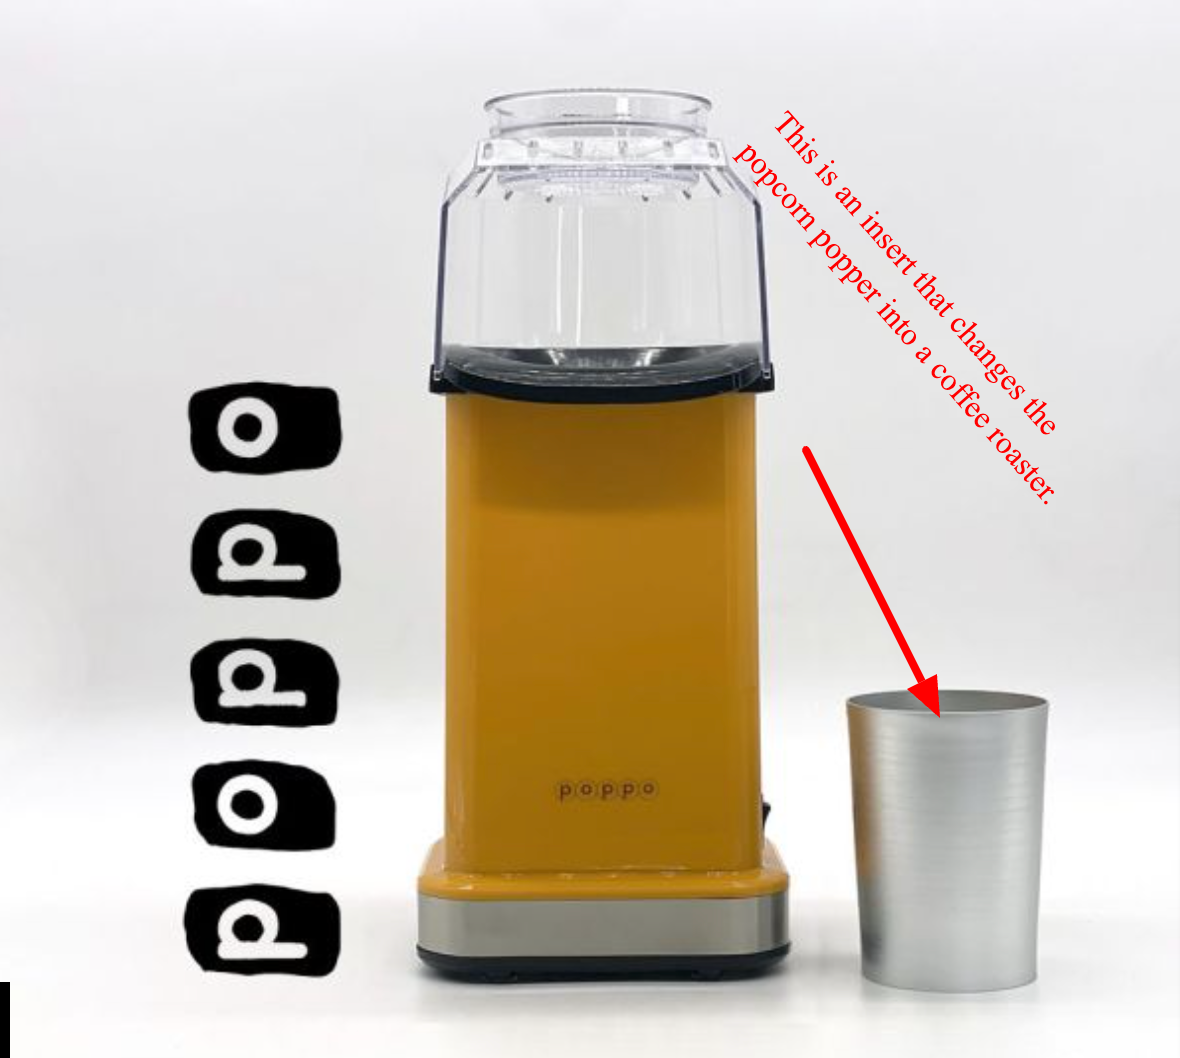
3. Popcorn popper method: My personal favorite for beginners. (Sweet Maria’s Poppo is a great, affordable choice. You can use any old popcorn popper, but Sweet Maria’s uses an insert that helps the beans roast evenly).
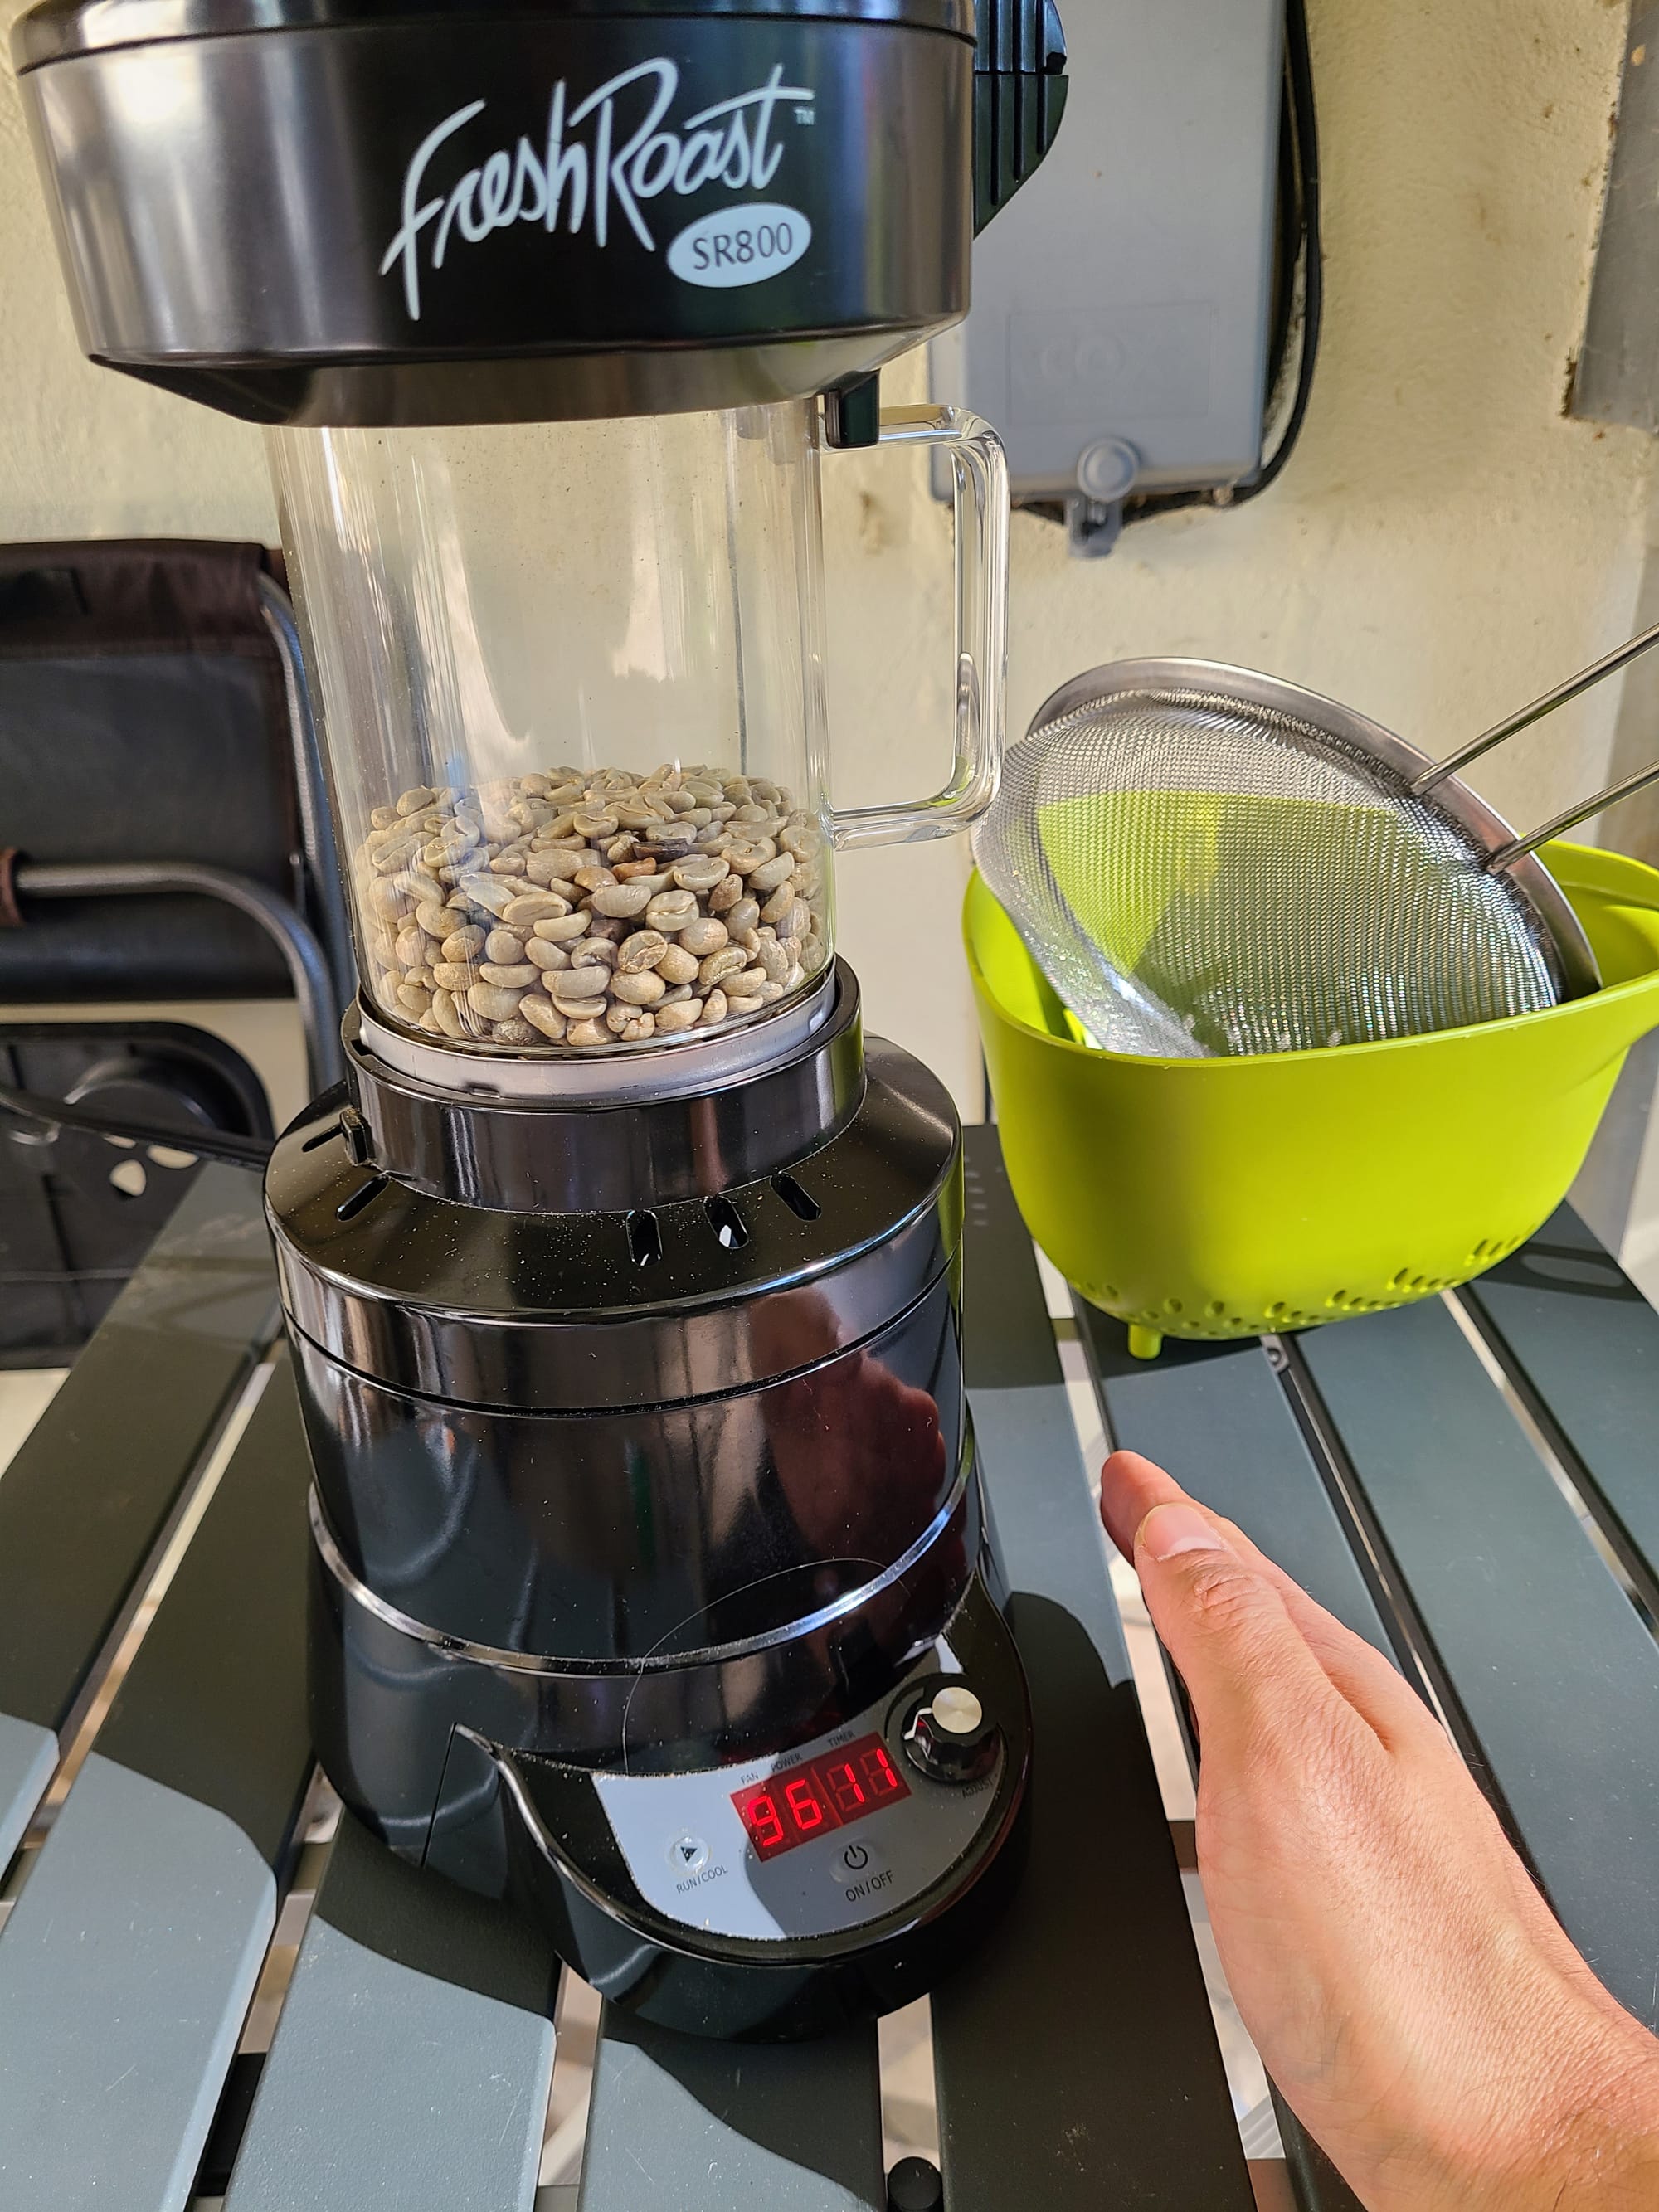
As you get more serious, get a dedicated home coffee roaster. But, if you’re just trying this out for the first time, any of those options are a great way to try it all out.
You'll also need:
- A thermometer (temperature is crucial in roasting)
- A colander (for cooling beans quickly)
- Containers (for storing your liquid joy... I mean, coffee.) I recommend getting cheap coffee bags with a release valve since roasted coffee releases gases after they’re roasted. You could also wait a few days and then put them into bags or containers.
Choosing Green Coffee Beans for Home Roasting
Learning how to roast coffee at home starts with good green beans. But where do you find them?
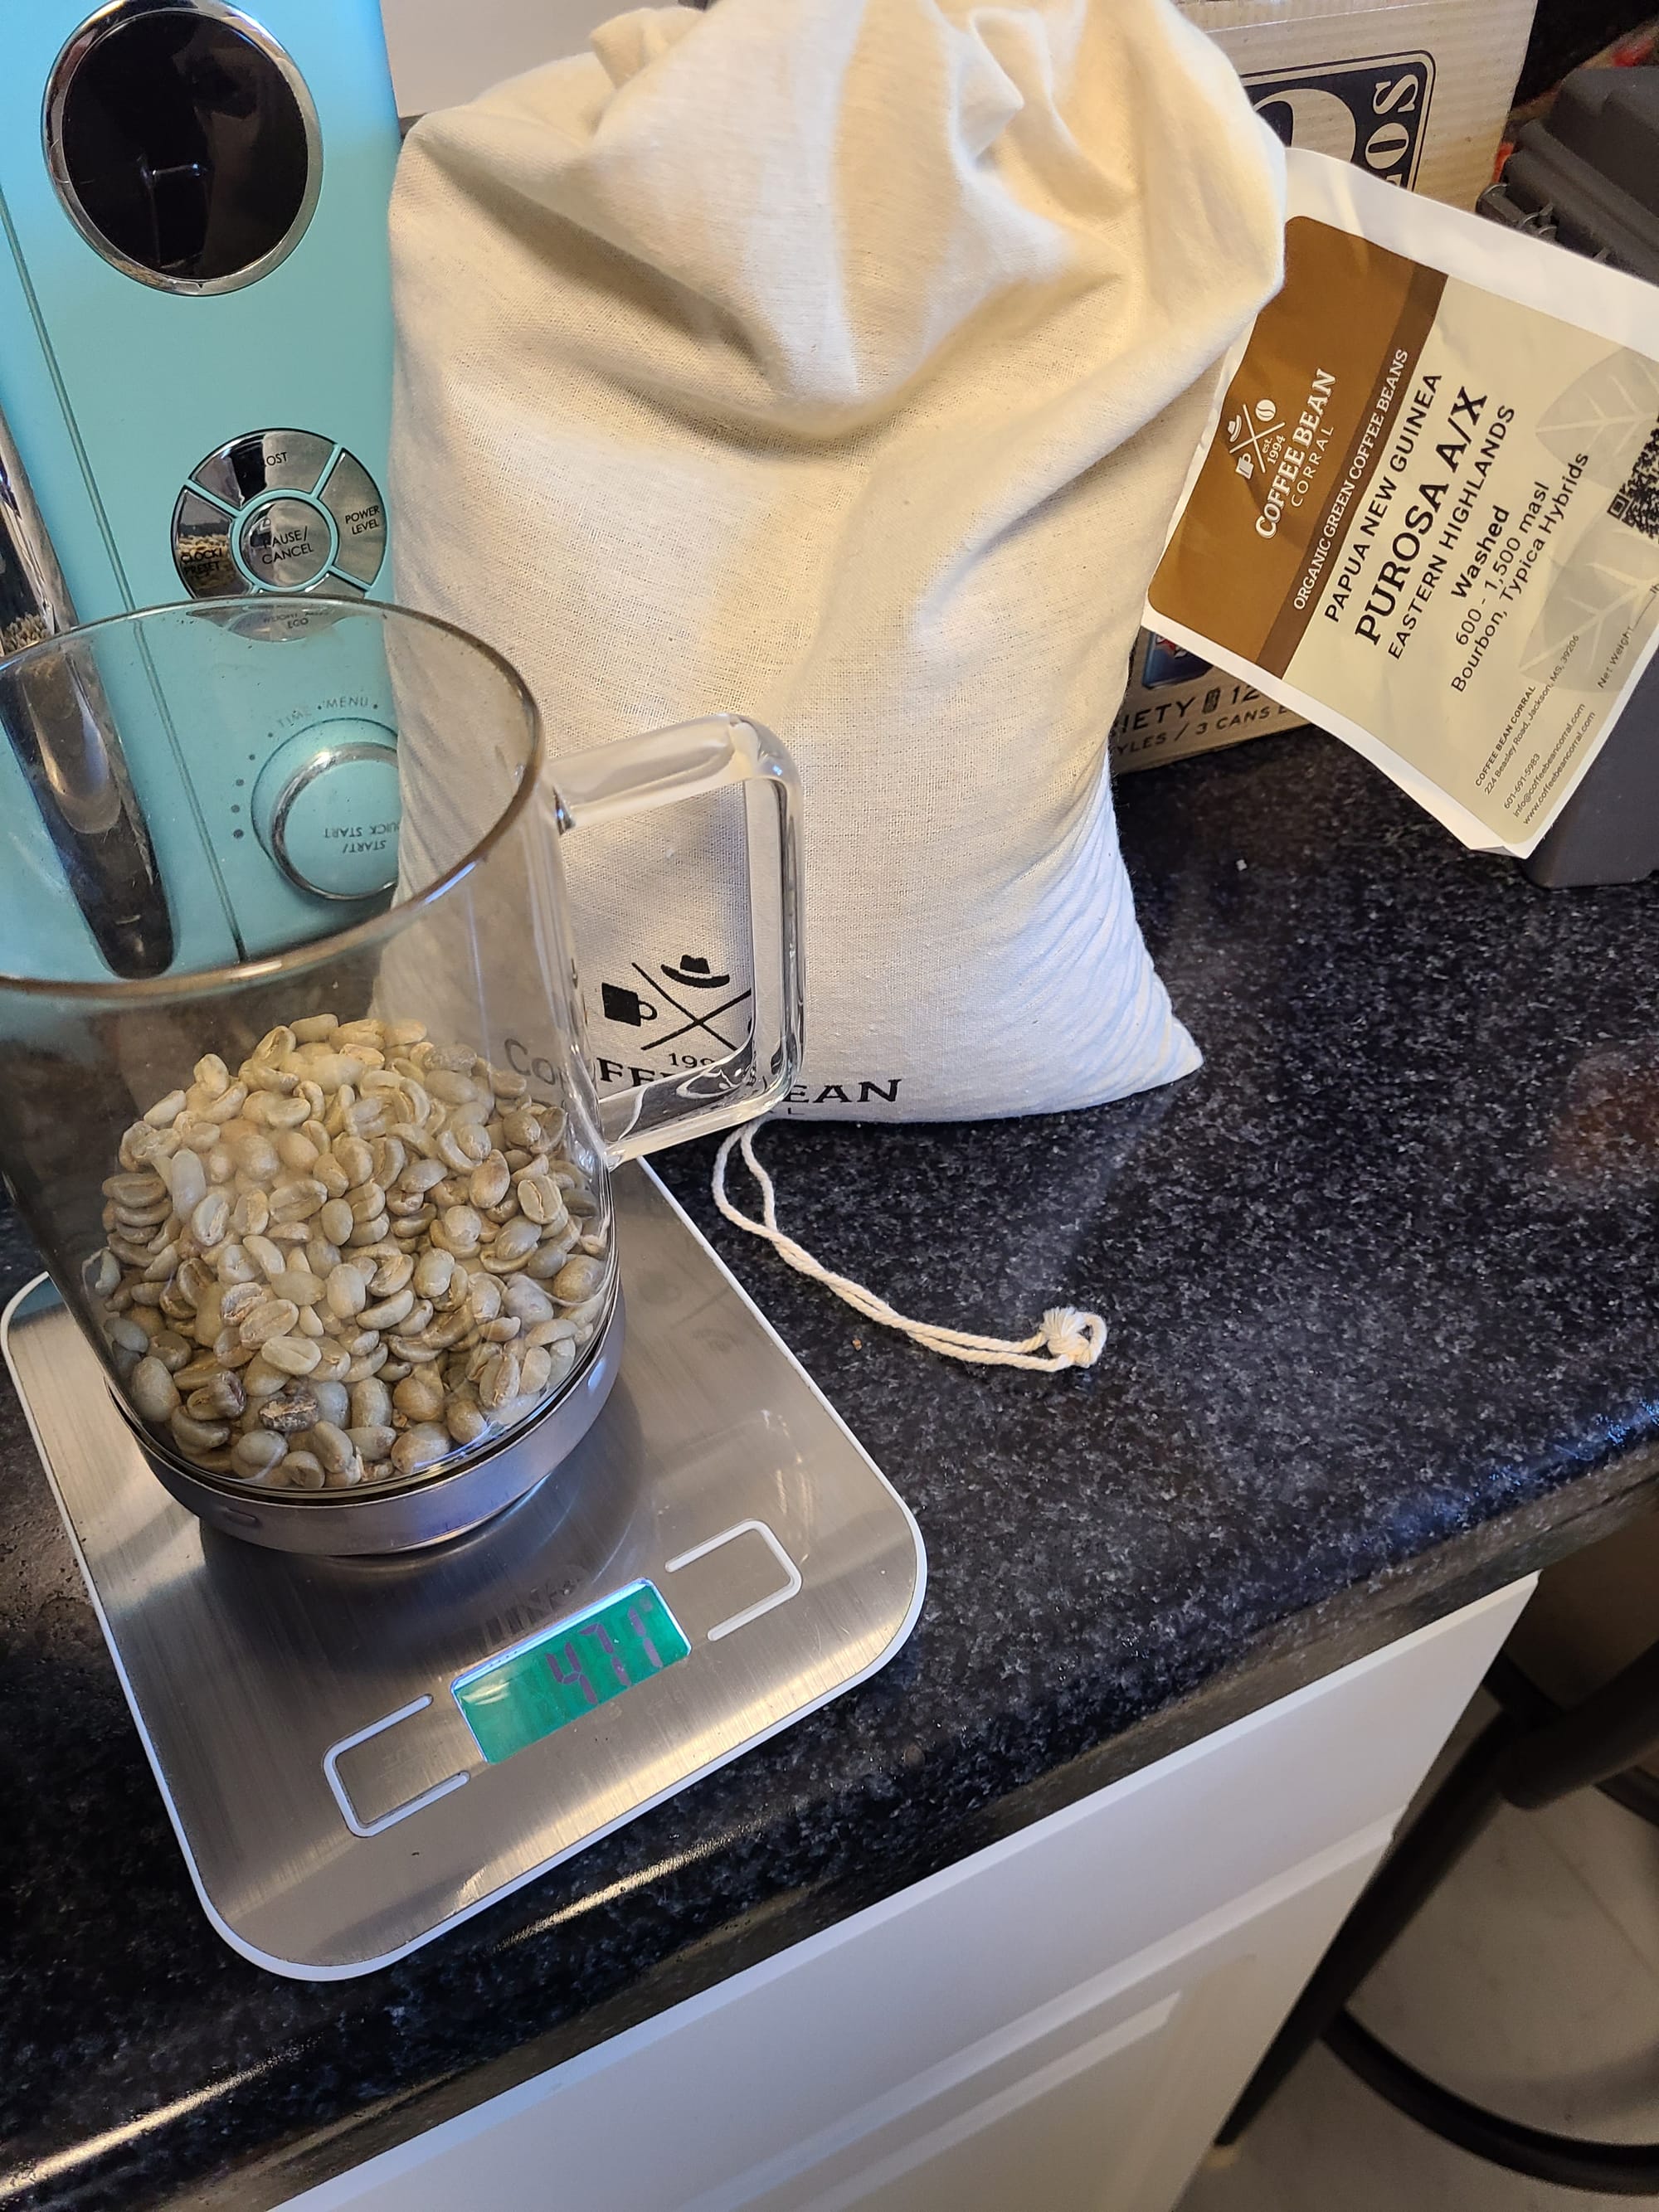
Online retailers like Sweet Maria's or Coffee Bean Corral are great places to start. Some local roasters also sell green beans. When choosing, consider the bean's origin - each region has its unique flavors. Ethiopian beans, for example, often have fruity, floral notes that are perfect for light roasts.
However, Coffee Bean Corral also has a “Coffee Bean Matrix” that can help you find the beans that match the flavors you’re looking for worldwide. (A great way to learn). Most places also sell sample packs of various types of coffee from different places as well.
Store your green beans in a cool, dry place. Unlike roasted beans, they can last for months or even a year when stored properly.
Step-by-Step Guide: How to Roast Coffee at Home
Alright, coffee warriors, it's time for the main event! Here's your step-by-step guide on how to roast coffee at home:
1. Prep your space: Choose a well-ventilated area. (Seriously well-ventilated. I always roast outside or in the garage. You may be tempted to roast in your kitchen, but if you do, get those windows open with extra fans going). Trust me, your smoke alarm will thank you.
2. Measure your beans: Start with about 1/2 cup of green beans (or whatever is recommended. The Poppo recommends ¼ of a pound.)
3. Heat your roaster: If using a pan, aim for about 500°F. For a popcorn popper, just turn it on.
4. Add the beans: Once hot, add your measured beans.
5. Keep them moving: Stir continuously if pan roasting. Other methods will do this for you.
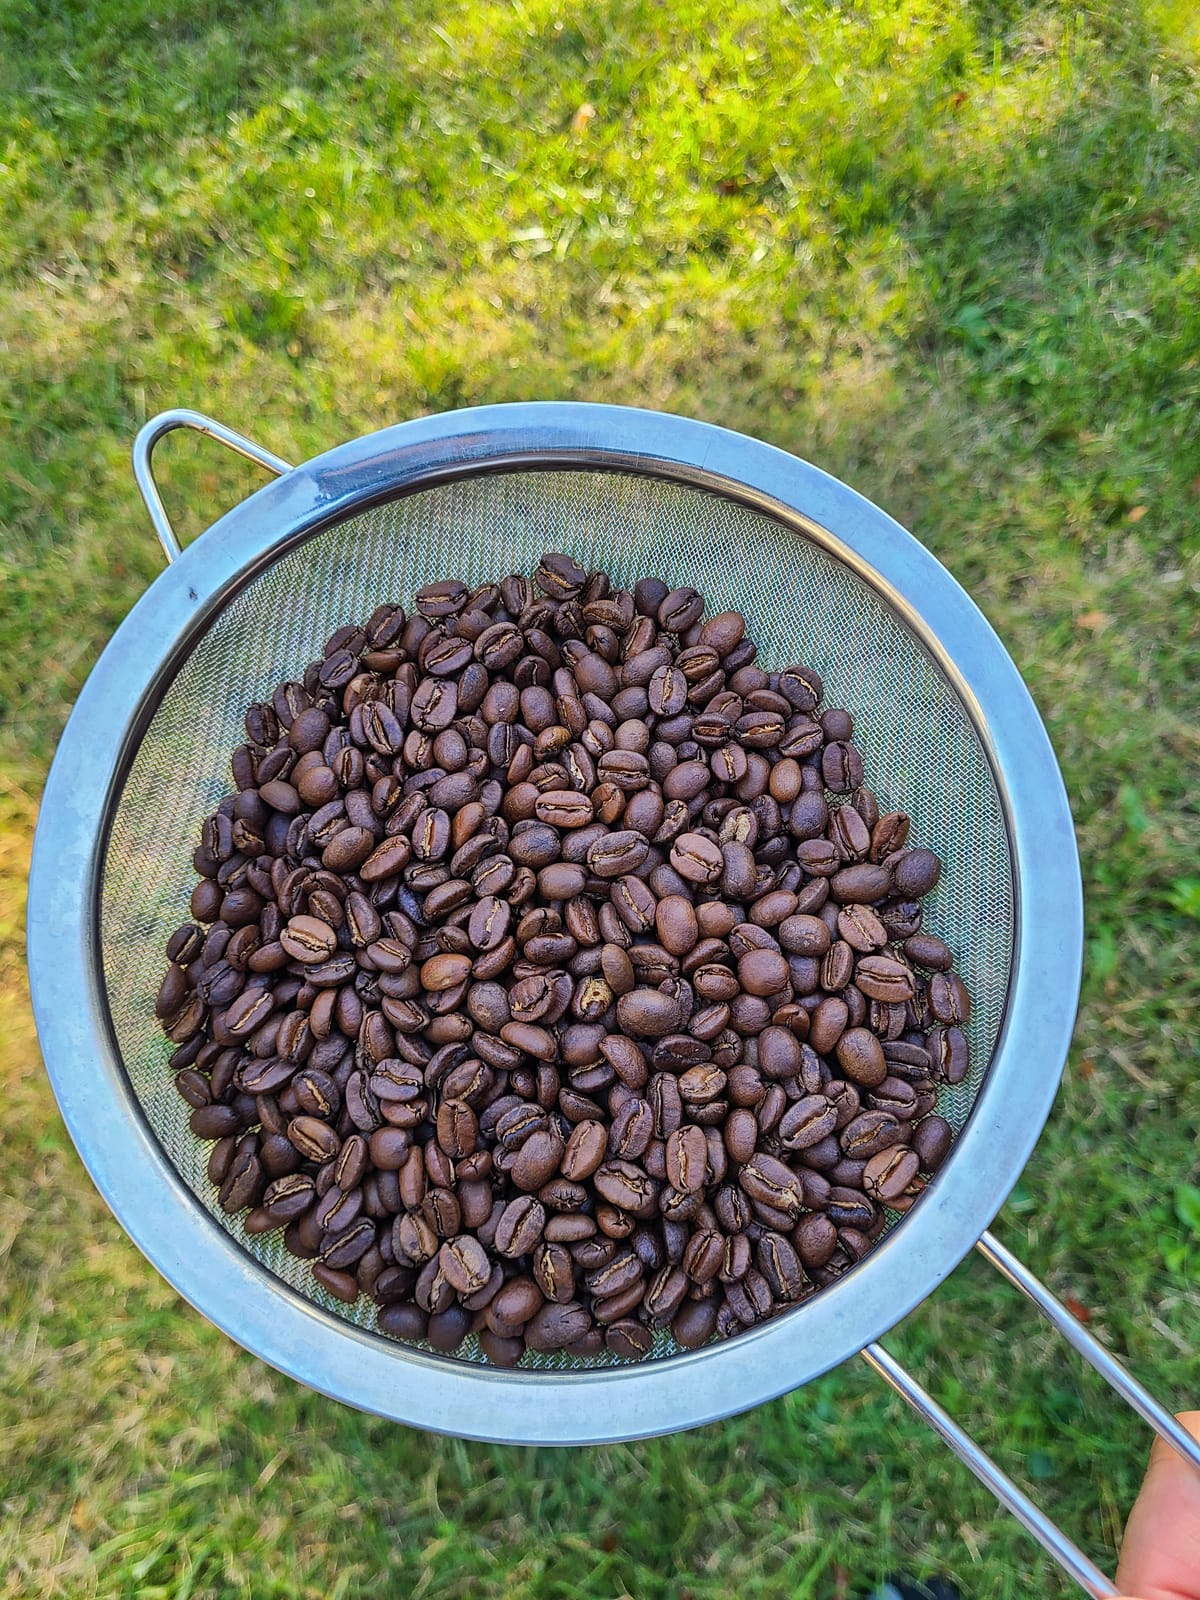
6. Watch and listen: The beans will turn from green to yellow to light brown to dark brown. You'll hear a "first crack" - it sounds like popcorn popping. Once the beans have hit their “first crack,” you’re now in the “light roast” zone. Also, around this time, the “chaff” (slivery skins, the consistency of peanut skills) will start separating from the bean.
7. Choose your roast level: Light roast is right after the first crack, medium at the end of the first crack and the beans getting darker brown, and dark roast at the “second (much quieter) crack”.
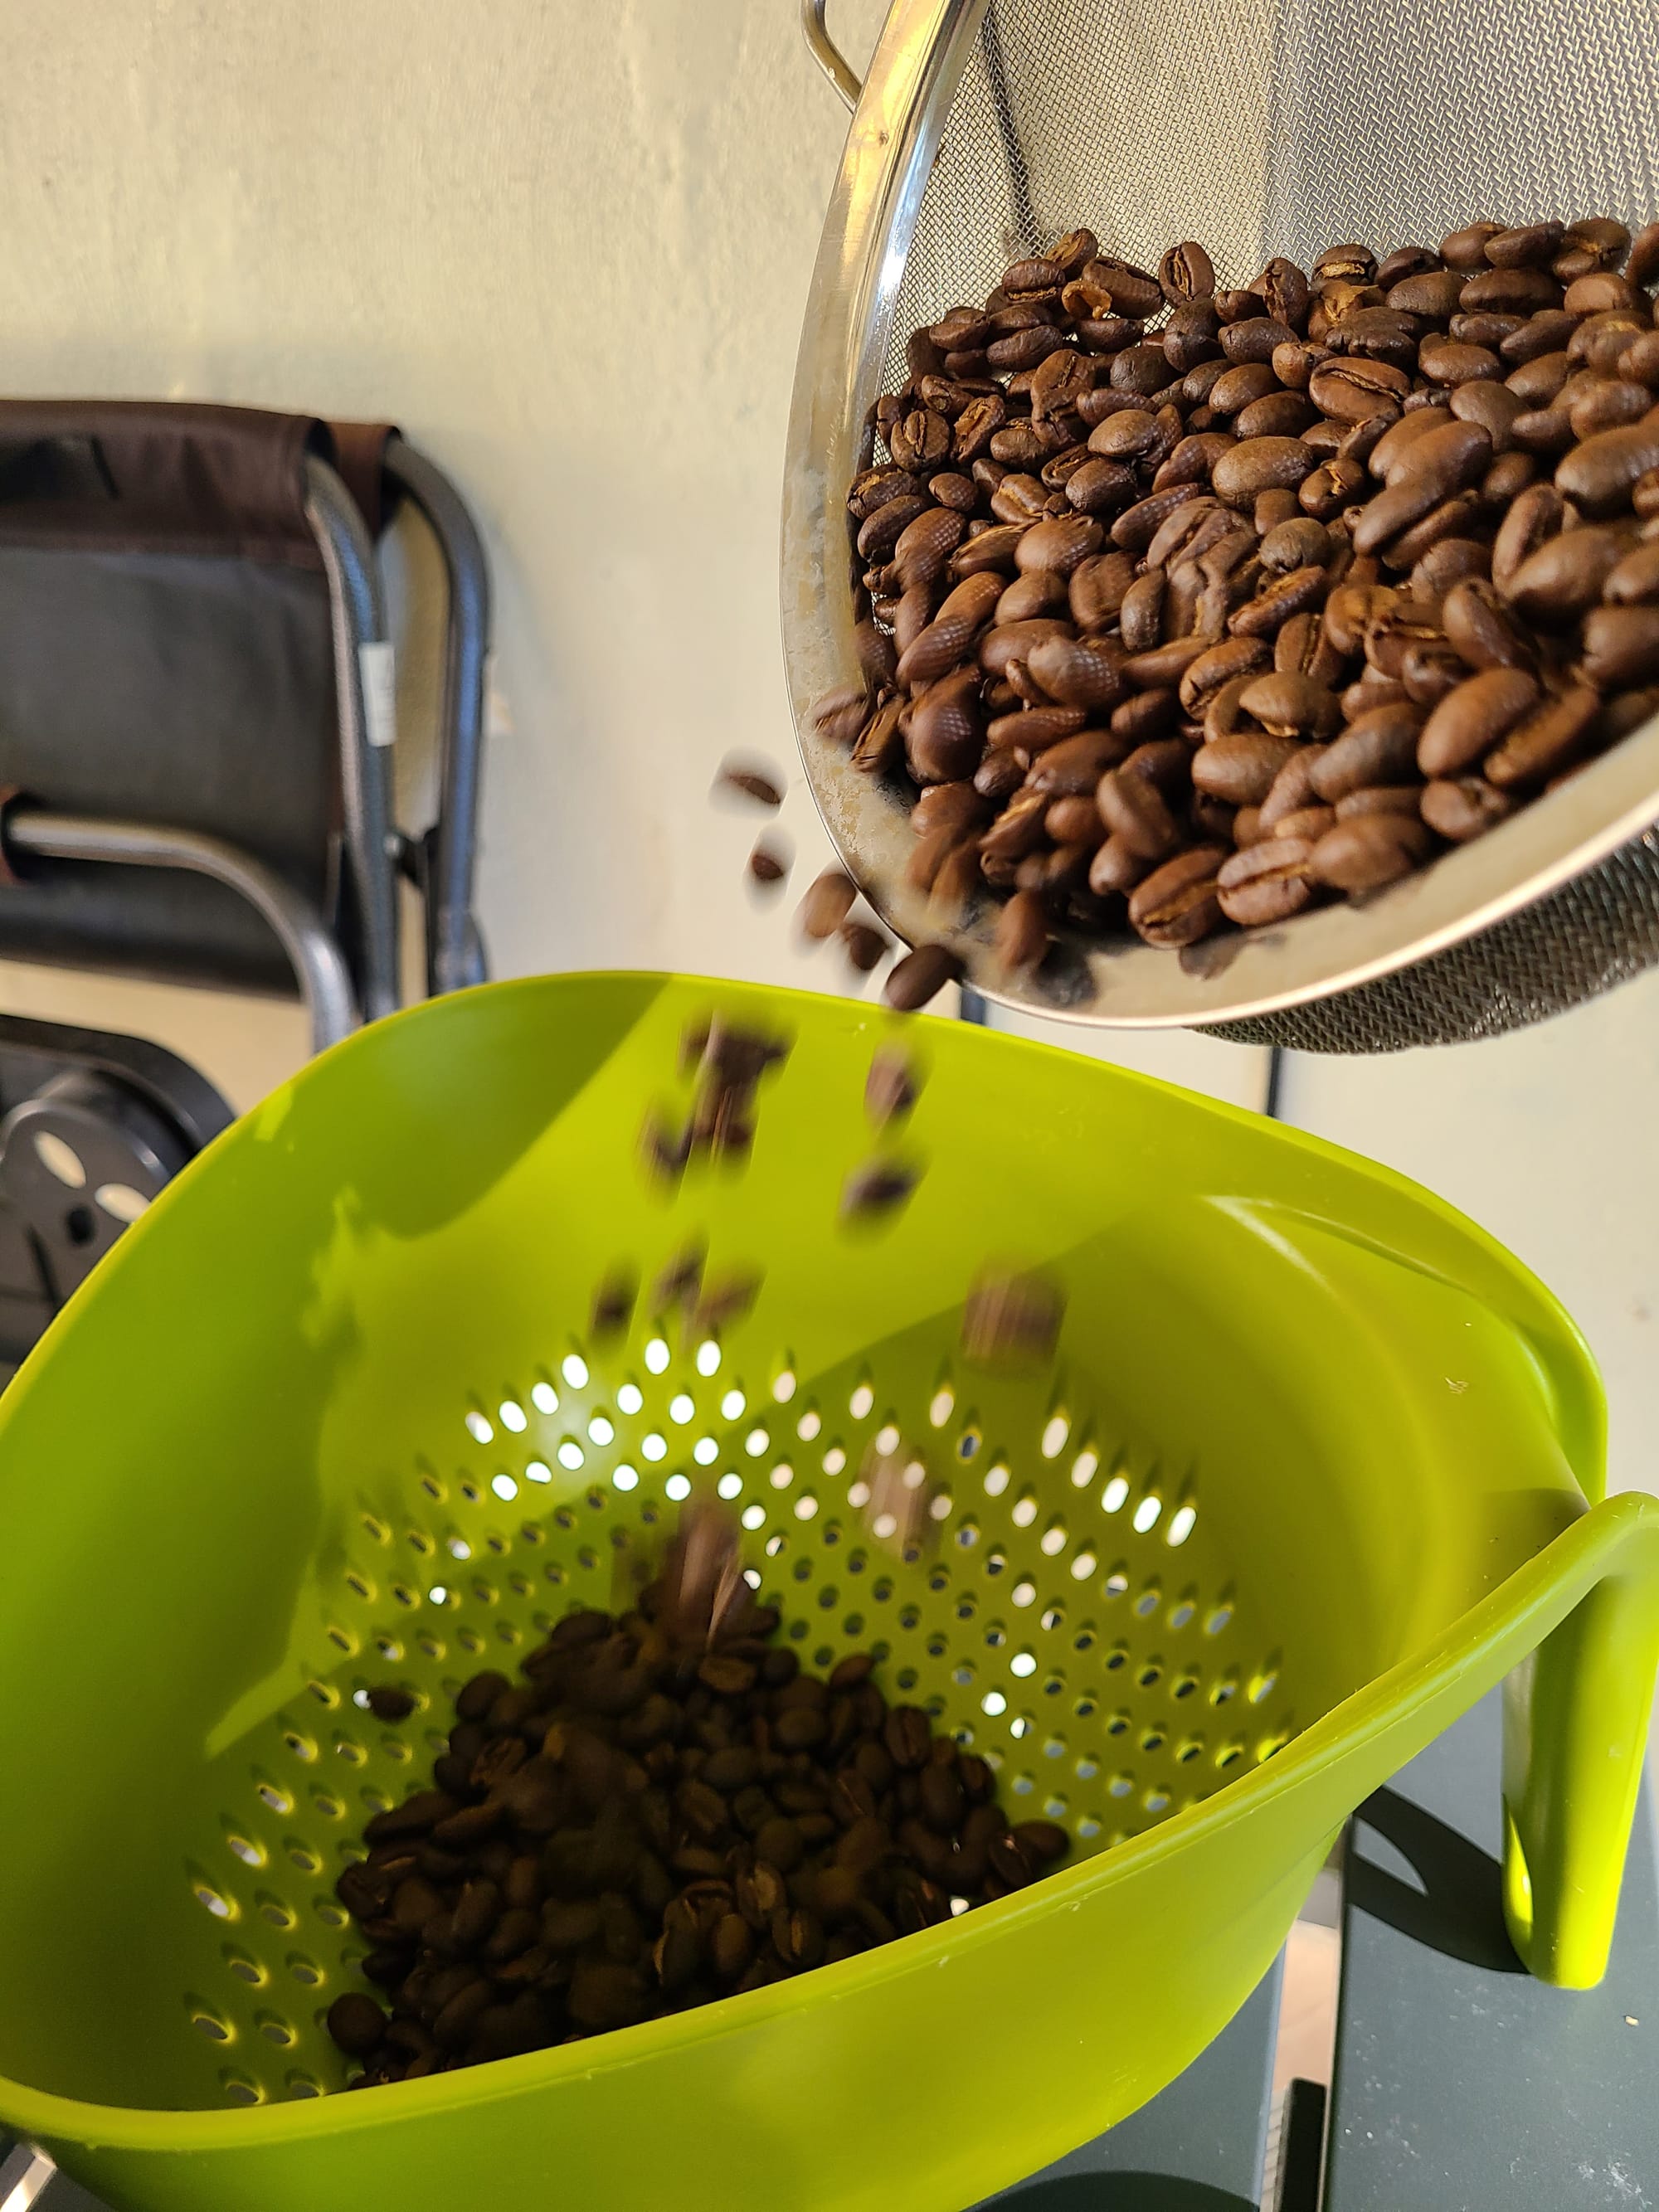
8. Cool quickly: Pour the beans into a colander and stir until they're warm, not hot. (I use two strainers outside and pour coffee from one to the other so that I can cool it and get the chaff off easily).
9. Store properly: Let the beans de-gas for 12-24 hours, then store in a container. If you’re not going to brew all of it within a week, consider keeping them in an air-tight container.
Remember, learning how to roast coffee at home is an art. It might take a few tries to get it just right, but that's part of the fun!
5. Understanding Coffee Roast Levels
As you're learning how to roast coffee at home, you'll discover that different roast levels bring out different flavors in your beans.
Light roasts are light brown and have no oil on the surface. They've got a higher acidity and often showcase the bean's original flavors.
Medium roasts are medium brown with a stronger flavor. There's still no oil on the bean surface, but you're getting more sweetness.
Dark roasts are dark brown to almost black and have a sheen of oil. They've got a robust, bold flavor with less acidity.
Experiment to find your perfect roast!
6. Tips for Successful Home Coffee Roasting
Here are some pro tips I've learned in my journey of discovering how to roast coffee at home:
- For lighter and medium roasts, try to get the beans roasted to a temperature of 385F and no longer than 14 minutes.
- For darker roasts, you’re looking for temperatures of 420F + and roasting for 15 minutes. You’ll know you’re in the dark roasts because the oils will start to glisten and caramelize. In a sense, the beans are beginning to burn, and that “burn” the blackness in the bean adds to that “dark flavor.
- Ventilate! Roasting produces smoke, so open those windows.
- Be consistent with your batch sizes for more predictable results. Track what you did and its results (a roasting journal). Trust me, you'll want to remember what worked (and what didn't).
- Don't be afraid to experiment with different beans and methods.
- Also, remember that these beginner methods, ovens, pans, and air poppers, don’t offer the kinds of control needed for coffee roasting, and often “flatten” the taste of the coffee. One example is that it’s really hard to raise the temperature slowly or keep the beans roasting evenly, both of which affect taste.
7. Common Mistakes to Avoid When Roasting Coffee at Home
Even coffee-roasting masters make mistakes. Here are some to watch out for:
- Overroasting: When in doubt, err on the lighter side. You can always roast longer next time.
- Ignoring the cooling process: Cooling quickly is crucial for stopping the roast at the right point. (Otherwise, the beans will keep cooking on the inside).
- Using dirty equipment: Clean your roaster after each use for the best flavor.
Learning how to roast coffee at home is a journey, not a destination. Each batch is an opportunity to learn and improve. So don't get discouraged if your first few attempts aren't perfect. Remember, even a "bad" home roast is usually better than store-bought beans!
Ready to start your home roasting adventure? Great! Get those green beans, fire up your roaster, and enjoy the wonderful world of freshly roasted coffee. Trust me, once you know how to roast coffee at home, you'll never look back. Happy roasting!
**** PRINTABLE CHECKLIST ****
Below is a printable checklist for home coffee roasting. This checklist covers everything from necessary equipment to the roasting process and post-roasting steps. It's designed to be easy to follow and can be customized based on individual preferences and roasting methods.
Here are a few tips on how to use this checklist effectively:
- Print it out and keep it in your roasting area for easy reference.
- Laminate the checklist or put it in a plastic sleeve so you can use it multiple times and check off items with a dry-erase marker.
- Feel free to add or remove items based on your specific roasting setup and preferences.
- Use the "Record Keeping" section to improve your roasting skills over time. Noting down details about each roast will help you replicate successful batches and learn from less successful ones.
- Share this checklist with other coffee enthusiasts who are interested in learning how to roast coffee at home.
Remember, roasting coffee at home is both an art and a science. This checklist will help you stay organized and consistent but don't be afraid to experiment and adjust based on your taste preferences. Happy roasting!